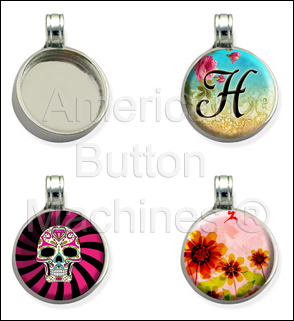
As you know, we recently launched our Magneta-Snaps™ and Clix™ lines of interchangeable magnetic jewelry. The response, as we anticipated, has been overwhelming, not only because the final product is so fun and customizable but also because of how easy it is to assemble.
In this post, we are going to present all of our Magneta-Snaps™ and Clix™ tutorial videos in one place (bookmark it now for future reference!) along with written instructions so that everyone will know how to make interchangeable magnetic jewelry with 1″ buttons and see how simple the process is.
How To Make Interchangeable Magnetic Jewelry With Magneta-Snaps™ Pendants and 1″ Buttons
Here all of the steps you need to follow to create a beautiful and stylish Magneta-Snaps™ pendant:
- Make your custom 1″ button.
- Get your Magneta-Snaps™ pendant blanks
- Choose your preferred magnet: standard or ceramic (Using the right size magnet is imperative; click here for more details.)
- Affix the magnet to the back of your 1″ button
- Slide/snap your 1″ button into the pendant blank
- To remove the 1″ button, just slide it right back out, or place another magnet on top of the 1″ button and pull it out. (Note: don’t be fooled by the ease of removal; because of the magnet, the 1″ button will stay safely affixed to the pendant blank until you want to take it out.)
Now watch the video that illustrates these steps:
—–
How To Make Interchangeable Magnetic Jewelry With Clix™ Pendants and 1″ Buttons
And now let’s talk about Clix™, which have two very important differences from the Magneta-Snaps™ pendants: Clix™ pendants have a magnet built in and use 1″ flat back buttons.
So the steps to creating magnetic jewelry items are similar, but with one assembly step and necessary magnet purchase eliminated, thus saving you time and money.
- Make your custom 1″ button.
- Get your Clix™ pendant blanks
- Slide/snap your 1″ button into the pendant blank
- To remove the 1″ button, just slide it right back out, or place another magnet on top of the 1″ button and pull it out. (Note: don’t be fooled by the ease of removal; because of the magnet, the 1″ button will stay safely affixed to the pendant blank until you want to take it out.)
Here is the video that shows you all of these simple steps:
—–
How To Make Interchangeable Magnetic Bracelets With Clix™ Pendants and 1″ Buttons
The best part about Clix™ is that you have options even beyond the simple pendant and necklace. You can also create bracelets with them!
Here are the steps for making interchangeable magnetic bracelets using Clix™ and your customized 1″ buttons:
- Make your custom 1″ button.
- Get your Clix™ bracelet blanks
- Slide/snap your 1″ button into the pendant blank
- To remove the 1″ button, just slide it right back out, or place another magnet on top of the 1″ button and pull it out. (Note: don’t be fooled by the ease of removal; because of the magnet, the 1″ button will stay safely affixed to the pendant blank until you want to take it out.)
And now, in video form:
—–
Now you know how to create interchangeable magnetic jewelry with 1″ buttons using both of our Magneta-Snaps™ and Clix™ products, plus the Clix™ bracelets. If you do have any questions, please feel free to post them below.
Happy snapping!
Brighid Brown – Director of Blogging and All Things Cool at ABM

